STEP 01
Install the tools once
You need Python 3.10 or later, pipx, and the Windows edition of Ski-E-O! or its demo installed through Steam. Linux with Proton is also supported. You can prepare maps on macOS, but this tutorial’s game launch requires Windows or Linux with Proton.
Launch the game once through Steam, then close it. If you already use Custom Map, update the CLI with the command below and run skieomod update to update the installed loader.
First time using Python or pipx?
Install Python from python.org, then install pipx. On Windows, run these commands in PowerShell:
py -m pip install --user pipx
py -m pipx ensurepathOn Debian or Ubuntu, install the distribution’s pipx package and run pipx ensurepath. For other systems, follow the official pipx installation instructions. Open a new terminal afterwards so the command is on your PATH.
Install the latest published tools and set up the game:
pipx install --force --index-url https://skieomap.emillon.fr/downloads/pypi/ skieo-custom-map
skieomod setup
skieomod --versionsetup installs UE4SS, the Custom Map loader and the Veymont example, and remembers the game directories. If it cannot find the game, use skieomod setup --game-dir "PATH TO GAME". Choose the Steam installation folder that contains SkiResortSimulator.
Checkpoint: skieomod --version prints a version number. This walkthrough was checked against the published CLI 1.11.1.
STEP 02
Know what your heightmap contains
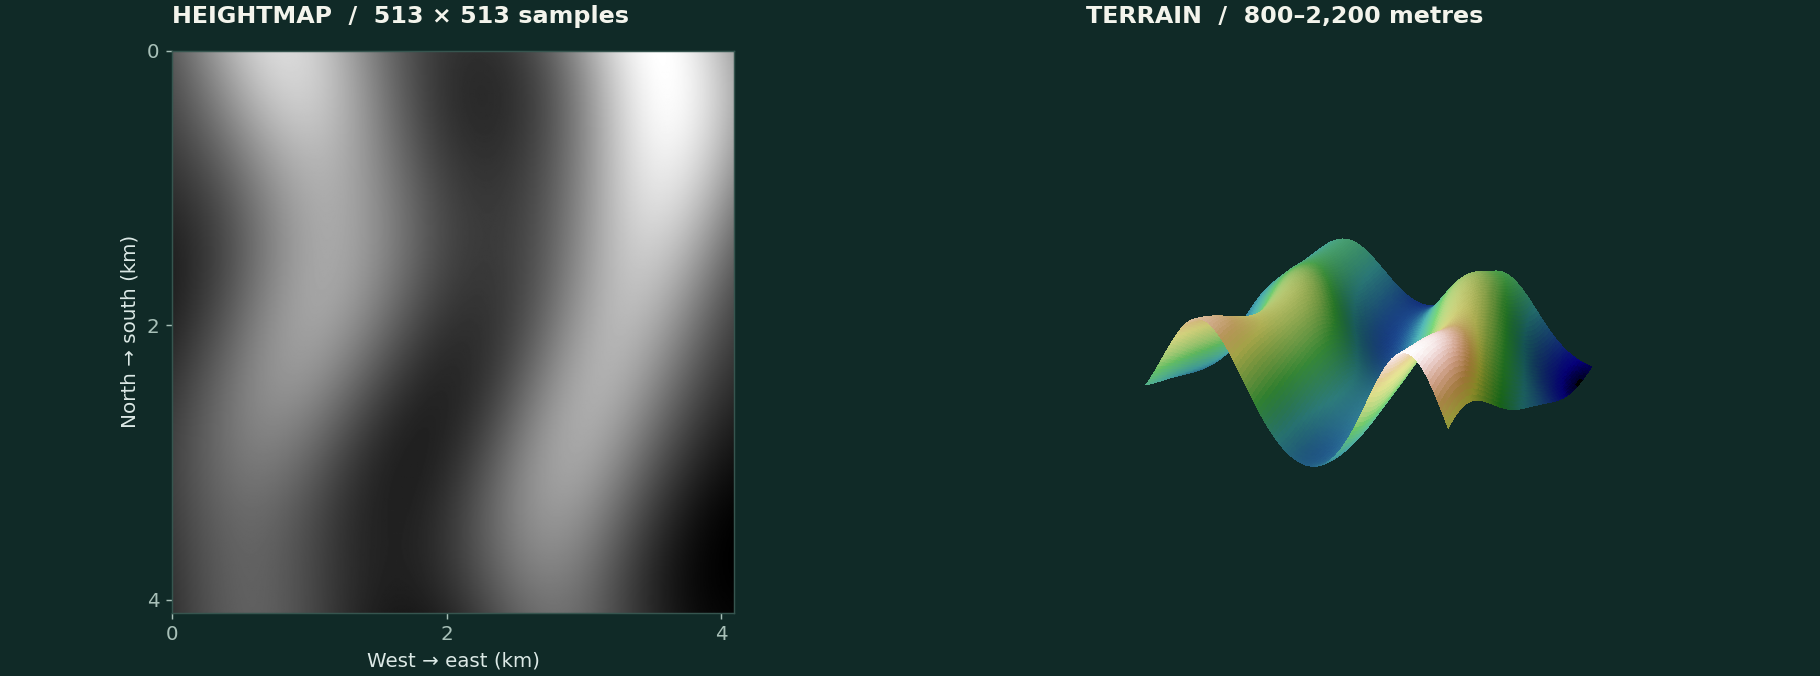
A heightmap stores one elevation sample per pixel or grid point. Dark usually means low and bright means high. To turn those numbers into terrain, you need the horizontal spacing and elevation encoding. The build reads PNG dimensions automatically; raw R16 needs explicit dimensions because it has no header.
| What you have | What to do |
|---|---|
Raw .r16 or .raw | Use a headerless grid of unsigned 16-bit integers. Supply its width and height in JSON. Little-endian is the default; set "format": "r16be" for R16BE. |
16-bit grayscale .png | Build from it directly. No additional package is required. Its dimensions are read from the image. Use a non-interlaced export without an alpha channel. |
| 8-bit PNG, JPEG, or a colour image | Return to your terrain tool and export a true 16-bit grayscale heightmap. Converting an 8-bit image to 16-bit does not recover lost elevation detail. |
| GeoTIFF or another DEM format | Use a GIS or terrain tool to export a 16-bit grayscale PNG or headerless unsigned R16. Record the export’s scale, offset, spacing and row direction. Reproject geographic coordinates into a metric grid and resample to equal X/Y spacing first. |
Do not rename a PNG to .r16. A PNG has a header and compressed pixels; an R16 file is just consecutive two-byte samples. Renaming it does not convert the data.
What you provide, and what the build calculates
- Dimensions: PNG dimensions are automatic. For raw R16 only, provide the number of samples per row and the number of rows. Rectangular maps are supported.
- Spacing: metres between neighbouring samples. If you know the intended width, spacing is
width_in_metres / (samples_x − 1). Use the same spacing in both axes. - Elevation: either the actual lowest and highest elevations in the file, or the sample scale and offset recorded by your exporter. A grayscale image alone does not tell you the real altitude.
You do not need to calculate the map extent, sample scale, actual elevation range or preview by hand. The build derives them from your source and its physical units. These formulas explain what it computes:
map_width = (samples_x − 1) × spacing
map_length = (samples_y − 1) × spacing
raw_file_bytes = samples_x × samples_y × 2
elevation_metres = sample × height_scale + height_offset
FOLLOW ALONG
Alpine Valley practice files
The example is a synthetic 513 × 513 grid with 8 m spacing: a 4,096 × 4,096 m map with elevations from 800 to 2,200 m. Rows run north to south and the R16 is little-endian. Its exact size is 526,338 bytes.

You can reuse the practice terrain freely under CC0. Use your own spacing and elevation values; raw R16 also needs its sample dimensions.
STEP 03
Create a map project
Create a working folder, for example SkiEO-maps. Save the heightmap there, and open a terminal in that folder. On Windows, File Explorer’s Open in Terminal action opens PowerShell at the right location.
For the practice terrain, run:
skieomod create map --output my-resort --name "Alpine Valley" --id author.alpine-valley --author "Your name"Replace Your name and the author prefix with your own name or handle. Keep the ID lowercase and unique, such as snowrider.alpine-valley. The starter terrain dimensions do not matter for this workflow: the build will replace them with values derived from your source.
SkiEO-maps/
├── alpine-valley.png
└── my-resort/
    ├── custom-map.json        Map identity and terrain settings
    ├── Terrain/heightmap.r16  Starter slope (regenerated by the build)
    ├── Scripts/main.lua      Commented map script
    ├── Vegetation/forest.json Example tree positions
    ├── docs/                 Guides for terrain, scripts and trees
    ├── README.md
    ├── preview.png
    └── workshop.json
create map generates a starter slope. It has not built your heightmap yet. Keep working from the parent SkiEO-maps folder for all commands below.
Checkpoint: the my-resort directory contains custom-map.json. If the directory already contains a project, choose a fresh output folder.
STEP 04
Describe your source in the JSON
Copy the practice PNG into my-resort/Terrain/ and name it source-heightmap.png. Open my-resort/custom-map.json in a text editor and add a top-level build section alongside metadata and terrain:
"build": {
  "heightmap": {
    "file": "Terrain/source-heightmap.png",
    "spacing_meters": 8,
    "elevation_meters": [800, 2200]
  }
},
The trailing comma separates this section from the next top-level property. Keep the rest of the generated manifest. If your project already has a build object for manual trees, add heightmap inside it; do not create a second build key. JSON does not allow comments. The file path is relative to the project folder and uses forward slashes.
That is all the heightmap configuration a PNG needs. The build reads its dimensions, derives the size and height encoding, generates the normalized menu preview and creates the portable R16. It also writes the calculated terrain fields back to your project JSON after a successful build. Keep your original PNG: later builds read it again automatically.
spacing_meters is the distance between samples. elevation_meters gives the known altitudes of the actual lowest and highest samples, not arbitrary black/white endpoints. Use your own values for a different heightmap.
I have a raw R16 instead of a PNG
Copy it to my-resort/Terrain/source-heightmap.r16. Use this build section instead:
"build": {
  "heightmap": {
    "file": "Terrain/source-heightmap.r16",
    "format": "r16le",
    "vertices": [513, 513],
    "spacing_meters": 8,
    "elevation_meters": [800, 2200]
  }
},
Raw files contain no dimension metadata, so vertices is required: [samples_x, samples_y]. Use r16be for big-endian input. The build converts either raw encoding into portable little-endian R16.
My exporter gives a sample scale and offset
Use those values instead of elevation_meters. For example, this encoding means that each stored unit adds 0.025 m above an offset of 724 m:
"build": {
  "heightmap": {
    "file": "Terrain/source-heightmap.r16",
    "format": "r16le",
    "vertices": [2017, 2017],
    "spacing_meters": 4,
    "height_scale_meters": 0.025,
    "height_offset_meters": 724
  }
},
The build finds the actual elevation range from the samples. These example values belong to this particular encoding; do not copy them for an unrelated export.
If your exporter maps black to a chosen bottom altitude and white to a chosen top altitude, the recorded scale is (white_altitude − black_altitude) / 65535 and the offset is black_altitude. The actual image may not contain pure black or pure white. Use the exporter’s settings when available.
My rows run south to north
Add "row_order": "south_to_north" inside build.heightmap. The default is north_to_south. Columns must run west to east; reverse them in your source tool first if necessary.
Optional: bake erosion, green ground cover and trees
CLI and Custom Maps 1.11.1 or later can prepare the landscape from the heightmap alone. Extend the same build object with this preset, or download the preset JSON. The settings below suit the practice terrain; adapt the tree line and climate to your mountain.
"build": {
  "heightmap": {
    "file": "Terrain/source-heightmap.png",
    "spacing_meters": 8,
    "elevation_meters": [800, 2200],
    "processing": {
      "resolution": 513,
      "smoothing": {"iterations": 2, "strength": 0.15, "max_delta_meters": 1},
      "thermal_erosion": {"iterations": 8, "talus_degrees": 35, "strength": 0.2, "max_delta_meters": 3},
      "hydraulic_erosion": {"iterations": 4, "strength": 0.06, "rainfall": 1, "max_delta_meters": 1}
    }
  },
  "vegetation": {
    "biome": {
      "tree_line_meters": 1900,
      "alpine_line_meters": 2400,
      "temperature_sea_level_celsius": 15,
      "lapse_rate_celsius_per_km": 6.5,
      "moisture": 0.65,
      "wind_strength": 0.3,
      "wind_direction_degrees": 270
    },
    "trees": {
      "seed": 42,
      "density_per_hectare": 90,
      "min_spacing_meters": 5,
      "max_slope_degrees": 32,
      "tree_line_fade_meters": 150,
      "patch_size_meters": 160,
      "patchiness": 0.6,
      "max_trees": 100000
    },
    "ground_cover": {"texture_size": 256, "max_slope_degrees": 45}
  }
},
Run the same build command in step 5. No separate converter, tree-placement file or Lua edit is needed. The build reads the original heightmap every time, applies the treatments in a fixed order, recalculates elevation and preview data, then bakes the vegetation from the final terrain.
| Setting | Effect |
|---|---|
smoothing | Softens local relief. strength controls each pass; iterations repeats it. |
thermal_erosion | Moves material downhill where the slope exceeds talus_degrees. |
hydraulic_erosion | Uses steepest-descent drainage and contributing area to move material downhill. rainfall is a dimensionless multiplier. |
max_delta_meters | Bounds the total height change per vertex for that treatment, across all its iterations. Budgets from different treatments can add together. |
resolution | Limits processing to 513 vertices on the longest axis here. Larger inputs retain fine source detail while receiving interpolated corrections. Allowed: 33–1025. |
tree_line_meters, alpine_line_meters | Upper altitude for trees and green ground cover. The alpine line must be higher than the tree line. |
| Temperature, moisture and wind | Control static growth suitability. Moisture and wind strength range from 0 to 1. Wind comes from the specified compass direction: 0 north, 90 east, 270 west. |
density_per_hectare, min_spacing_meters | Control candidate density and tree separation. Habitat filters reduce the actual tree count. |
max_slope_degrees, tree_line_fade_meters | Exclude steep ground and thin the forest as it approaches the tree line. |
seed, patch_size_meters, patchiness | Give reproducible forest patches. Use another seed for a different arrangement. |
max_trees | Caps the forest. At the cap, the build retains a seeded uniform subset across the map. |
ground_cover.texture_size | Resolution of the grass/rock albedo. Use a power of two from 16 to 512; the build supplies all mip levels and the material mapping. |
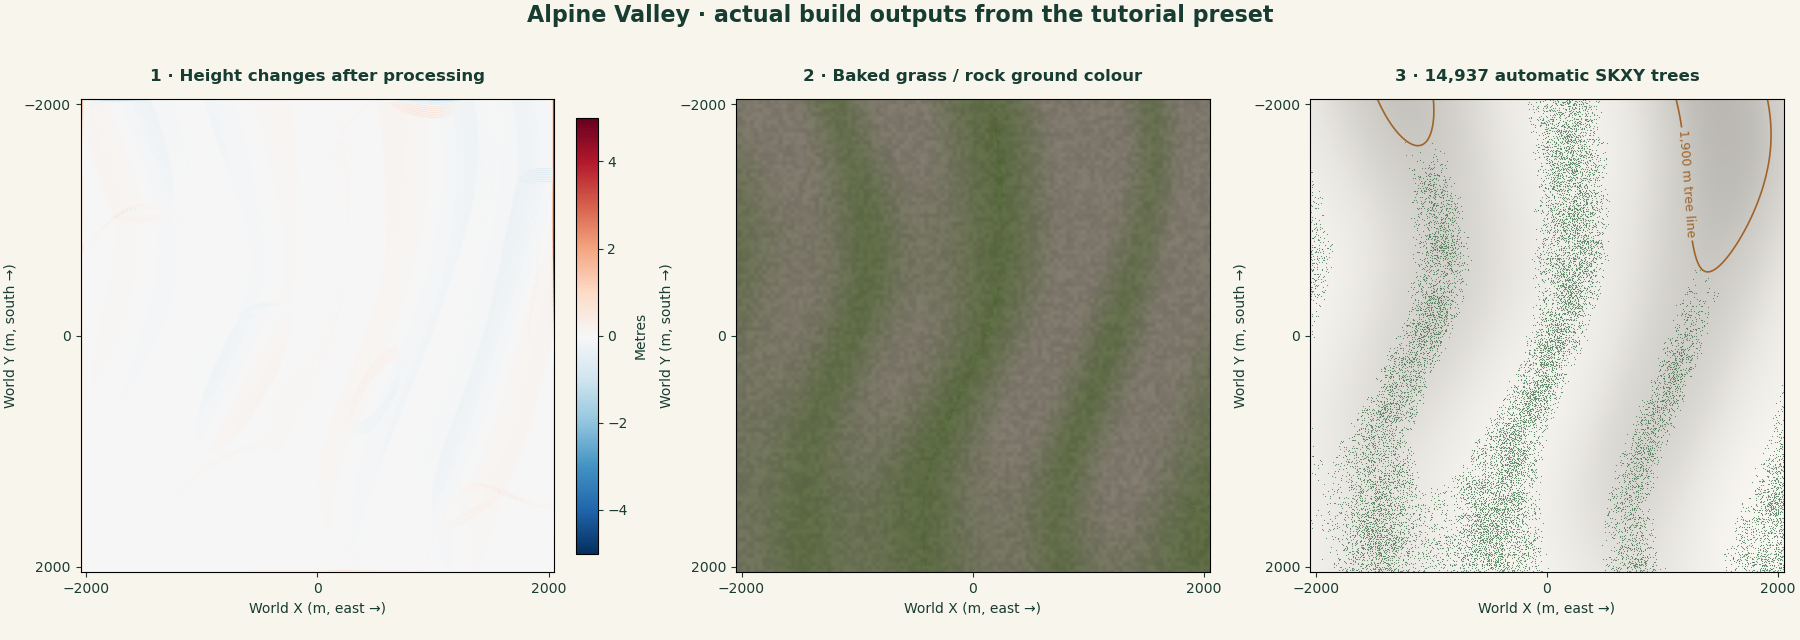
These are bounded terrain-authoring approximations. They do not reproduce the official developer’s complete erosion and climate bake. Drainage does not fill depressions or create rivers. Wind affects vegetation exposure; weather and snow remain managed by the game. Ground cover is grass/rock colour on the terrain, not 3D grass blades.
The drainage routing follows the D8 steepest-descent principle; thermal erosion uses a critical slope, a common heightfield modelling technique. The implementation and budgets here are specific to these community tools.
Disable a treatment or add fine detail
Omit an individual processing method to disable it; omit processing for the original relief. Add "noise": {"amplitude_meters": 0.25, "wavelength_meters": 64, "seed": 42} inside processing for reproducible detail. The wavelength must span at least two processing grid intervals. The boundary is preserved.
Use "enabled": false inside trees or ground_cover to disable that component. Removing vegetation restores the authored terrain material. With automatic trees off, any configured build.forest supplies the manual forest; otherwise the generated forest is empty.
Reserve a clearing or place trees manually
Add "exclude": [[-60, -40, 60, 40]] inside trees to keep a 120 × 80 m clearing around the centred origin. Each rectangle is [west, north, east, south] in world metres: X east, Y south. min_elevation_meters can also set a lower altitude limit.
For manual trees, keep "forest": {"file": "Vegetation/forest.json"} alongside heightmap inside build and edit the source array of {"x": 10, "y": -20} points. Automatic trees take precedence when enabled. The build converts manual JSON to SKXY float32 centimetres; automatic trees are written directly in SKXY. The game reads only the compiled binary. JSON is an authoring format.
Inspect Terrain/Generated/build-report.json for height-change and tree-count statistics, Terrain/Generated/albedo.png for ground colour, and Vegetation/Generated/ground-cover.png for the growth mask. The forest is Vegetation/Generated/forest.skxy. Generated rendering overrides and the importer entry point live in the package; your original script and manual JSON remain editable.
Checkpoint: the JSON points to the original source file and describes its physical units. No separate import or conversion command is required.
STEP 05
Build and validate the map
From the parent SkiEO-maps folder, run:
skieomod build my-resort
skieomod test my-resort
skieomod test my-resort/bin/author.alpine-valley-0.1.0.skieomapThe heightmap path and settings come from the JSON. If you chose another ID, substitute it in the last filename. A successful build creates my-resort/bin/author.alpine-valley-0.1.0.skieomap.
Terrain summary for the practice data
Terrain: 513 x 513 samples; 4096 x 4096 m; 800 to 2200 m elevation; portable R16LEThe build updates terrain.source, size_meters, elevation_meters, the centred origin and preview.samples in your project JSON. It writes the generated terrain to Terrain/heightmap.r16 and backs up the replaced manifest and terrain under .heightmap-backups/. The original source-heightmap.png or source-heightmap.r16 stays intact.
You can inspect the calculated values after building, but you do not need to enter them. The package contains the portable R16, map metadata, script and referenced resources; the development-only build section and original PNG are omitted. The loader constructs the terrain in the game.
test my-resort checks a freshly prepared package using the same JSON settings without changing the source project. Validation does not prove that the slopes, snow or gameplay feel right. If you change Lua scripts, install Lua 5.4 and additionally use skieomod test my-resort --check-scripts.
Checkpoint: the terrain summary matches your source, and both the project and the exported archive are reported as valid.
STEP 06
Try the terrain in Ski-E-O!
Close the game, then run:
skieomod run my-resortrun rebuilds your project, installs it into the saved map directory and opens the game through Steam. If the map selection screen appears, choose New Game → Custom Map → Alpine Valley. Use a new session to check the imported terrain before working with an existing save.
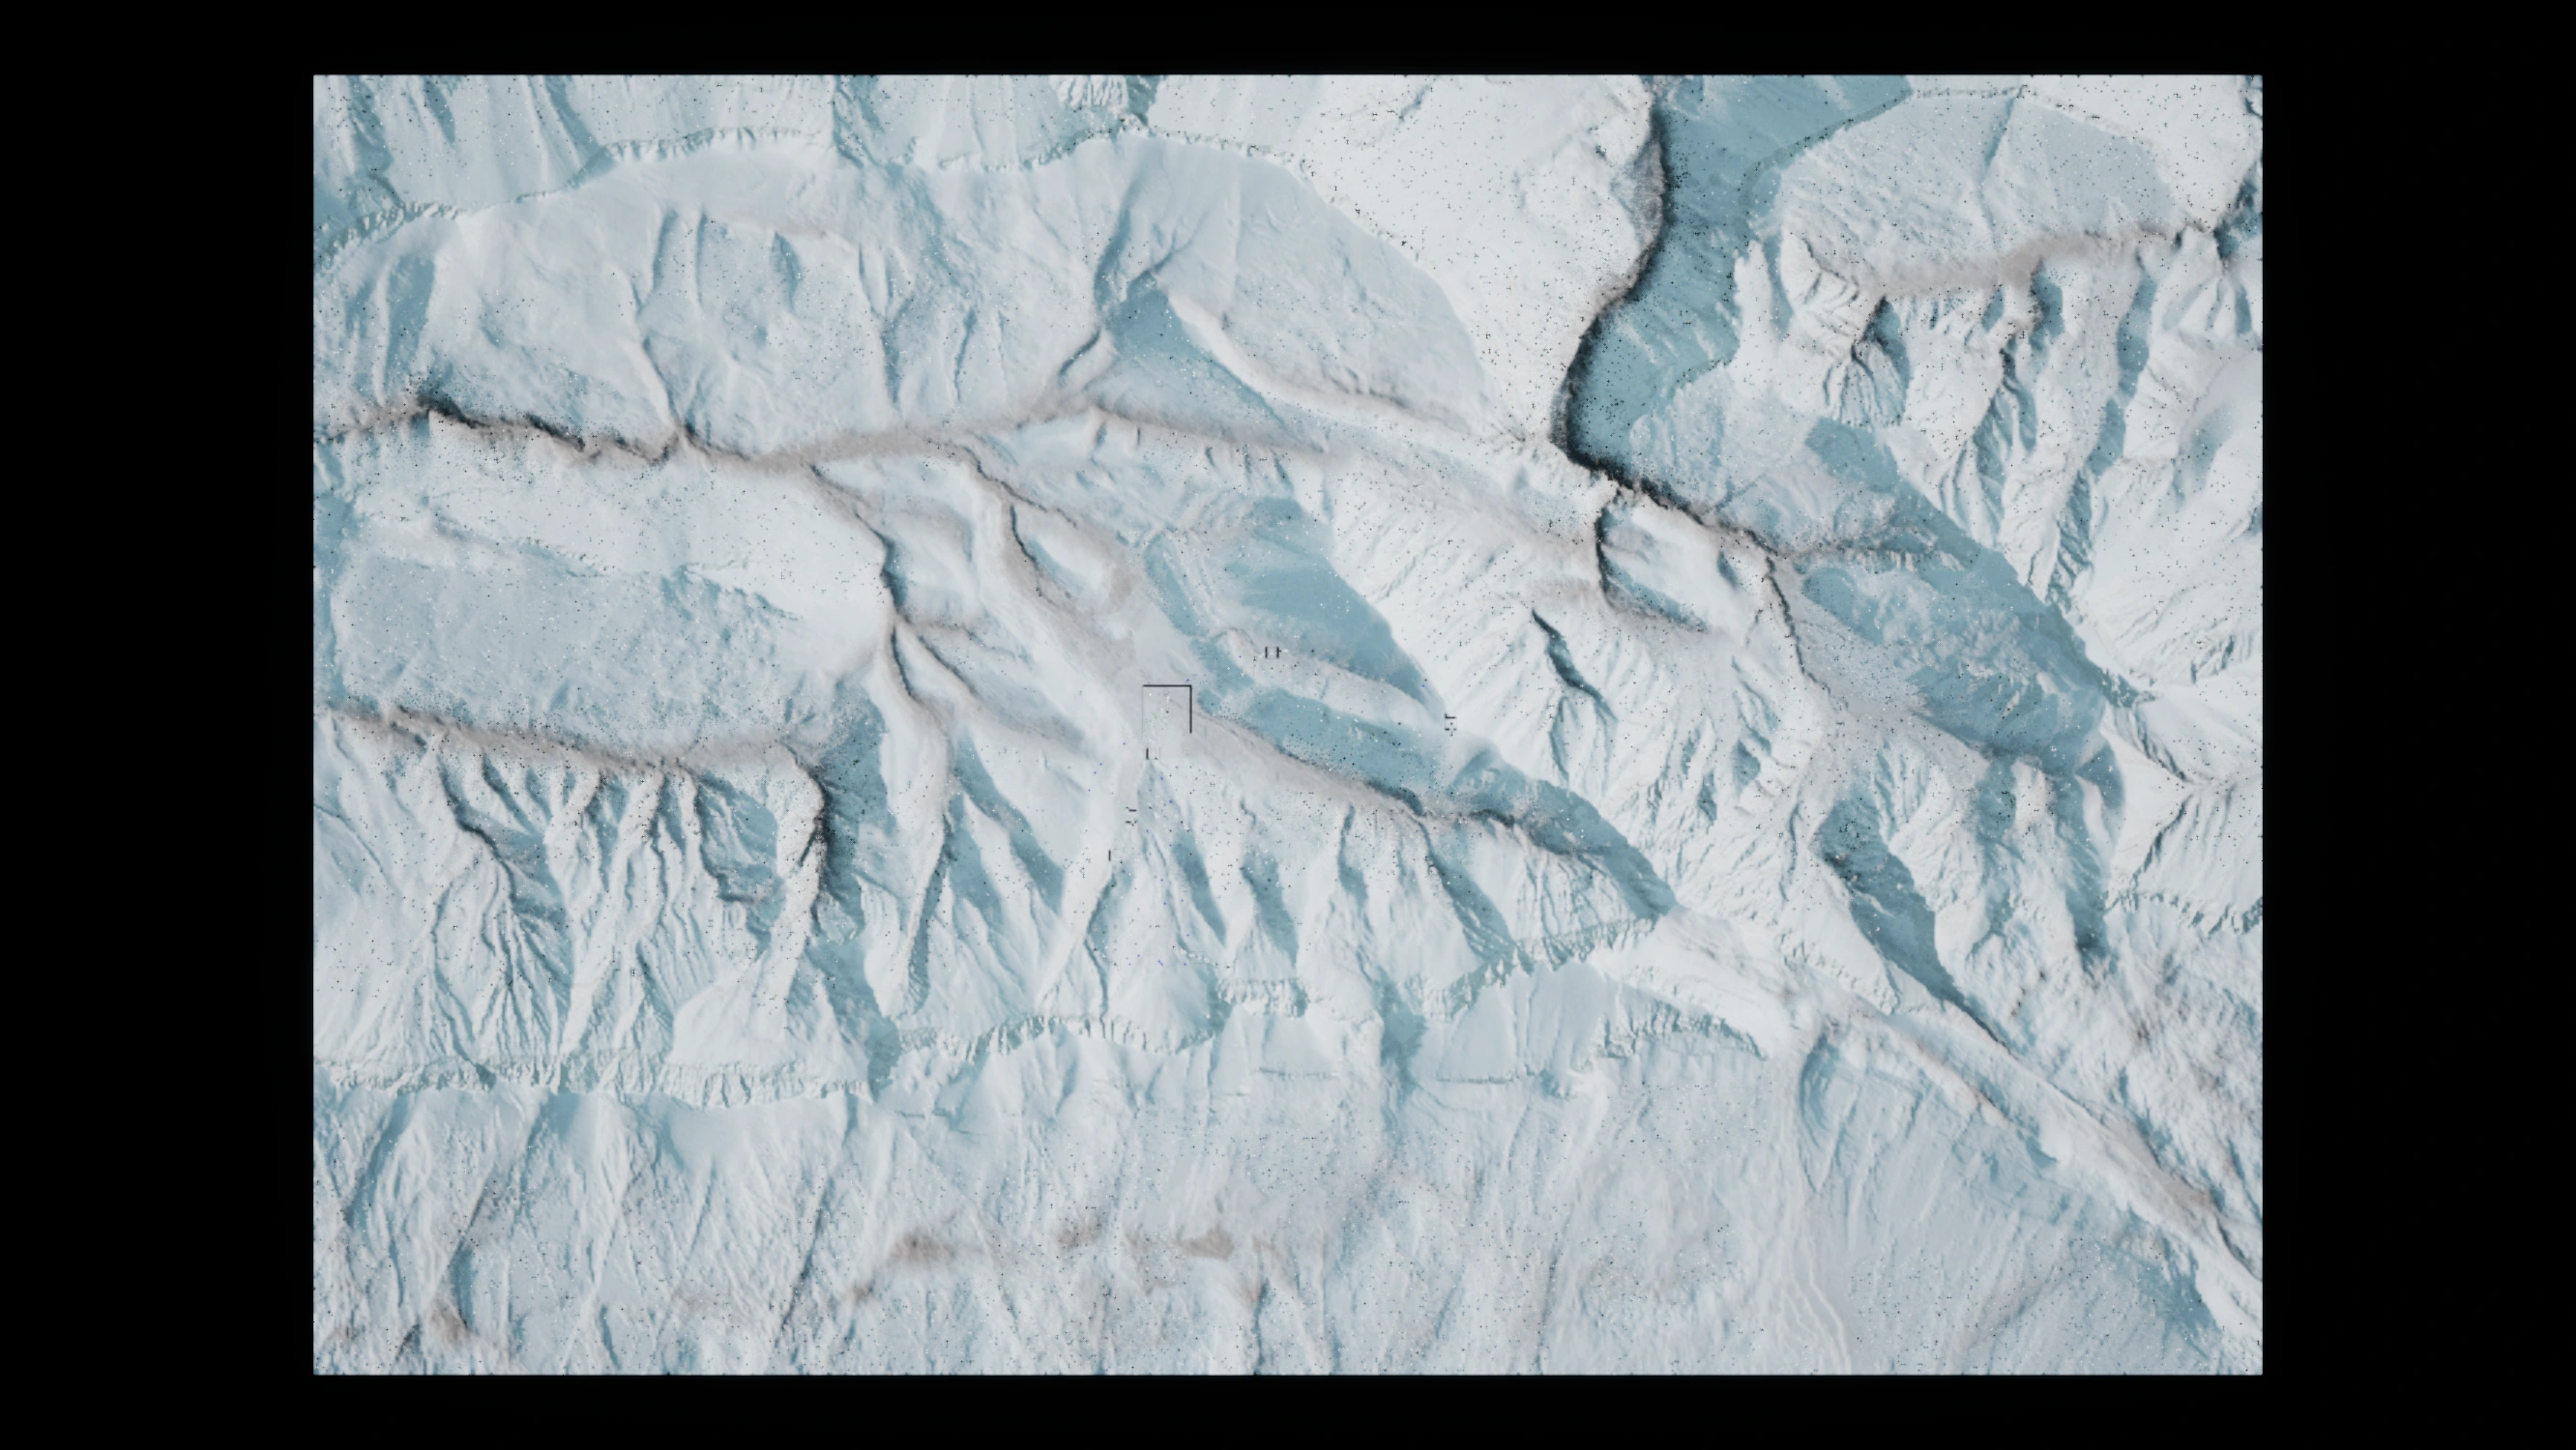
- Move around the terrain. Check that ridges and valleys face the expected directions.
- Check the elevation readout at a known high or low point. A recognisable shape can still have the wrong scale.
- Try a trail, building placement and snow tools to check the surface and collision.
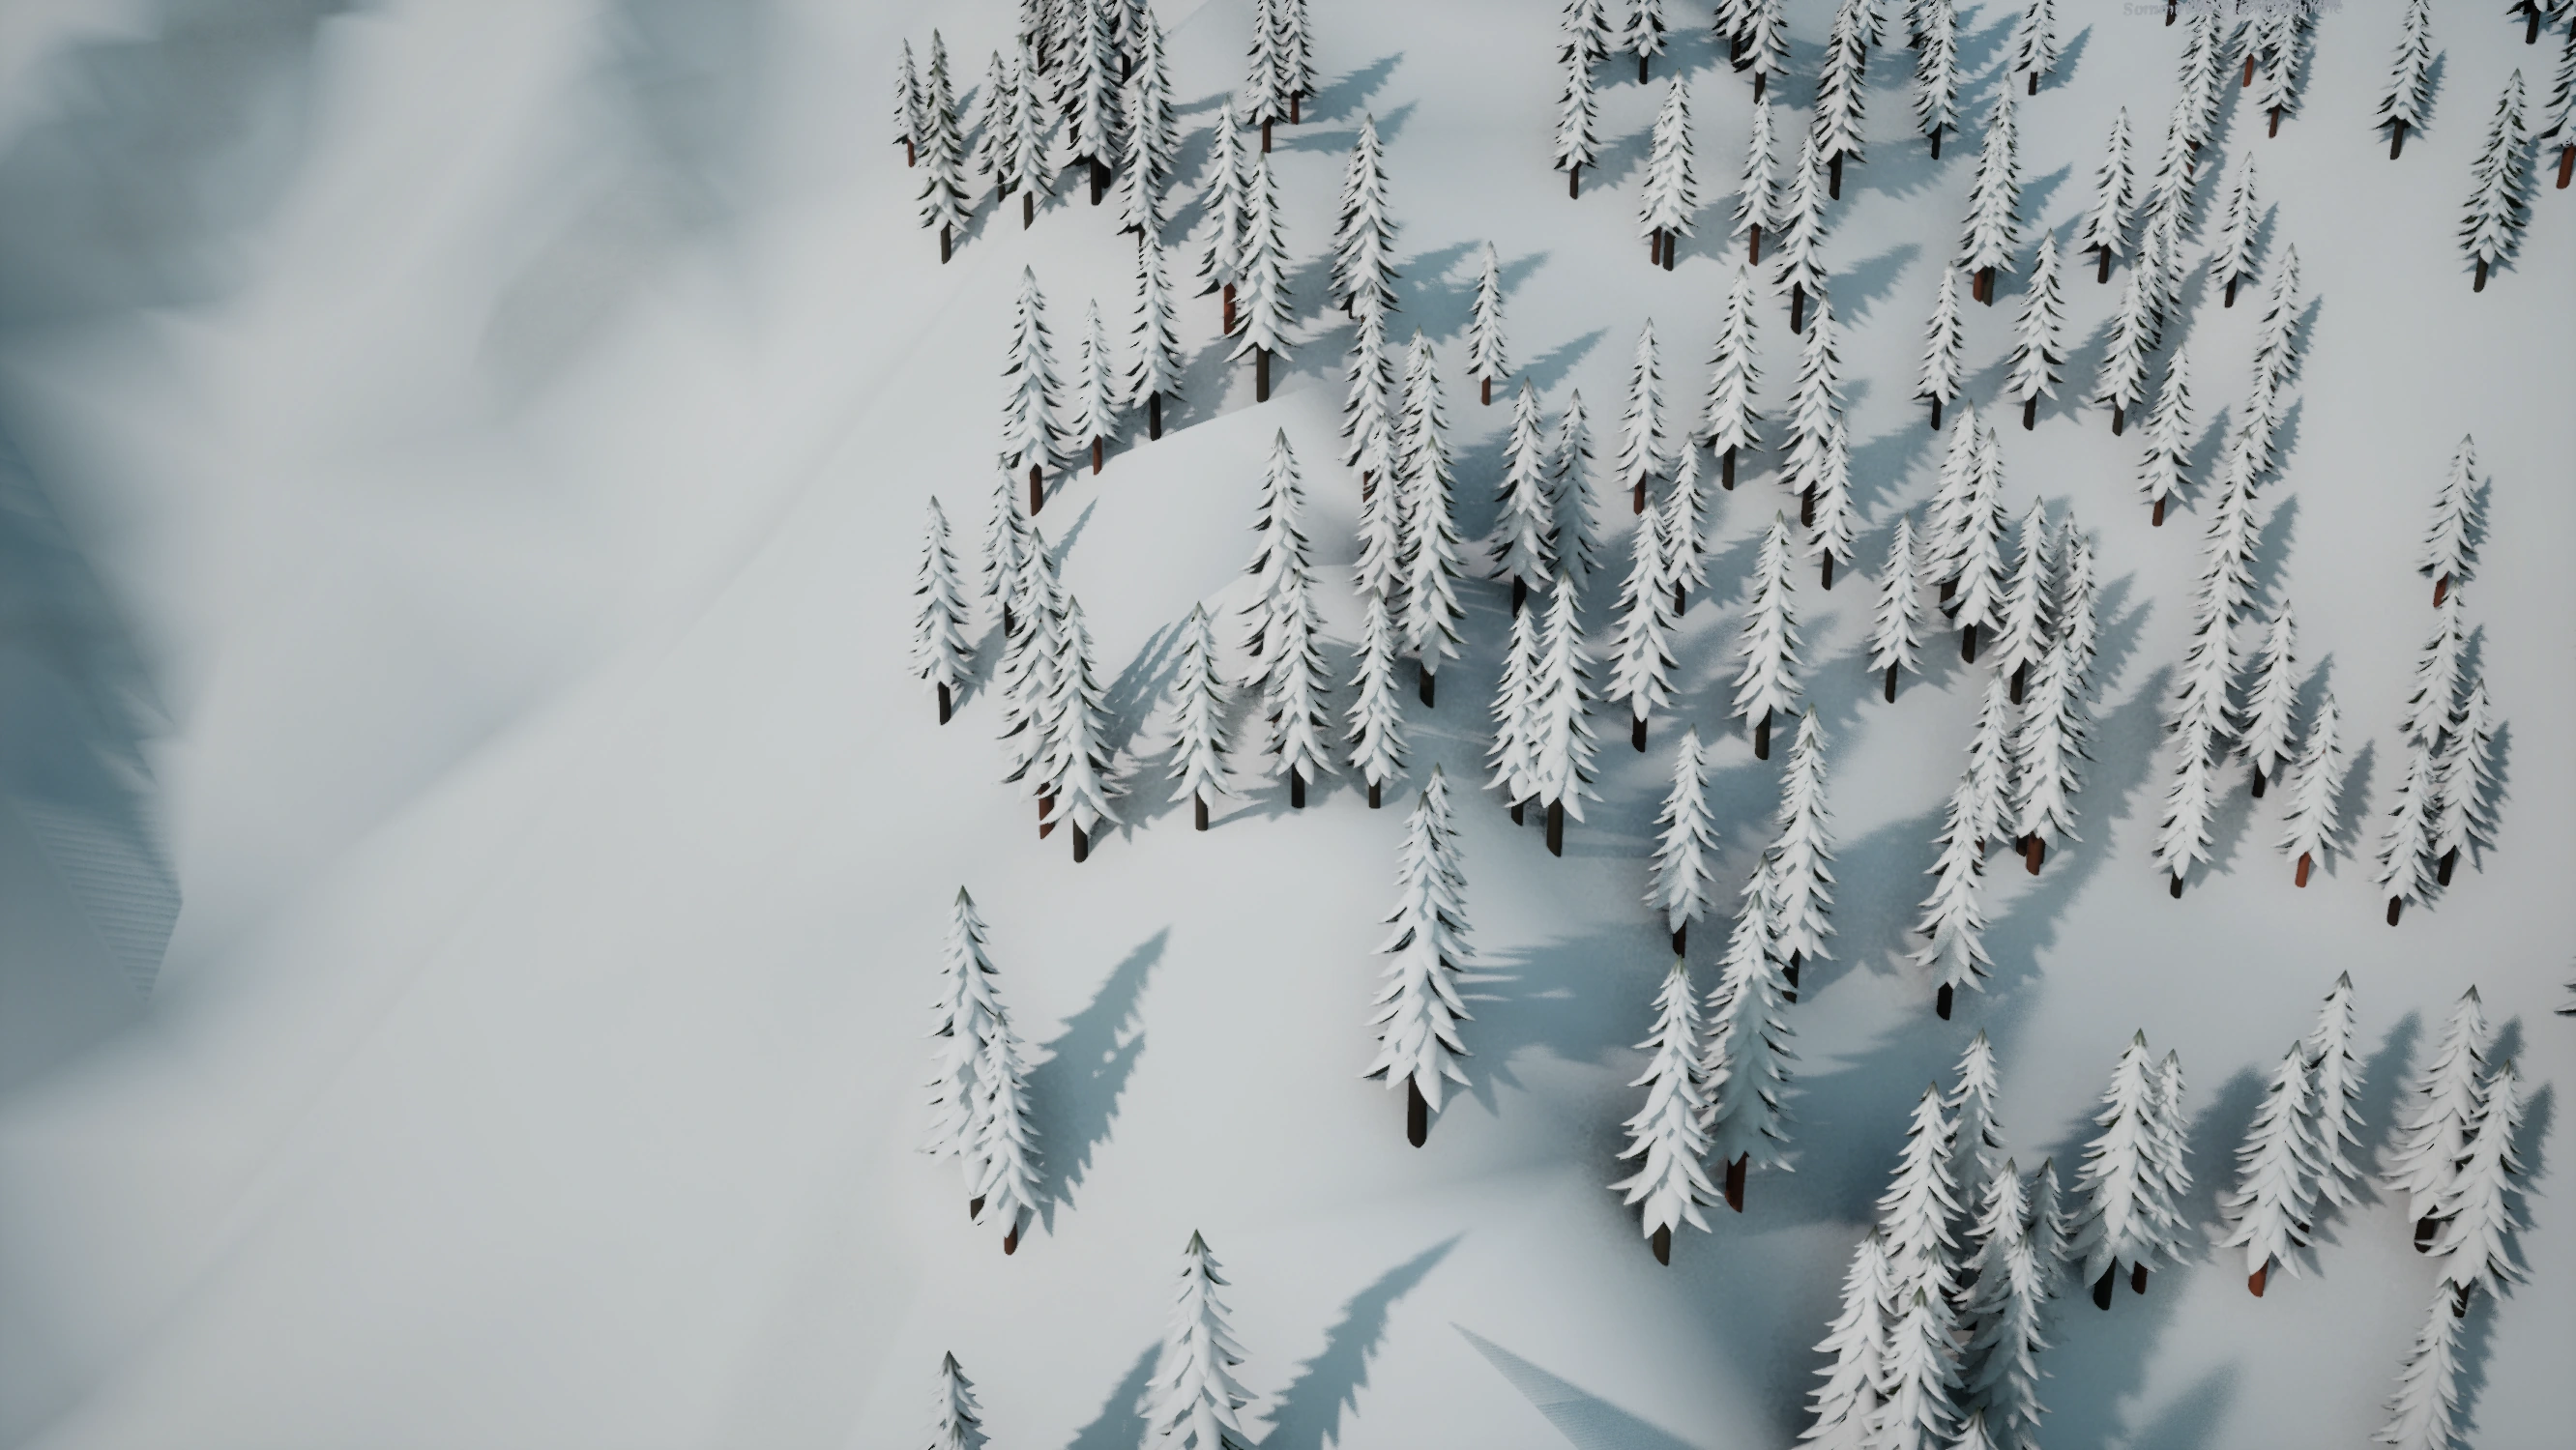
- Inspect tree roots up close and check forest coverage across the full map, including both ends of rectangular terrain. Forests follow the biome, elevation and slope limits.
The optional bake supplies green ground cover and trees. A heightmap still does not specify ski lifts, buildings or a complete resort; add those after the terrain behaves correctly. Start a new session when comparing build settings.
I prefer to install the built file manually
After skieomod setup, run skieomod config and find maps_dir. Copy the built .skieomap into that folder, normally SkiResortSimulator/Content/Paks/~mods/ inside the Steam game installation. Keep the package as one file. Start the game through Steam and choose it from New Game → Custom Map.
Checkpoint: you can start a session on your terrain, with the intended size, elevation and orientation.
WHEN SOMETHING LOOKS WRONG
Troubleshooting
| Symptom | Check |
|---|---|
skieomod is not recognised | Run pipx ensurepath, reopen the terminal and try skieomod --version. |
| Build says the byte count is wrong | Use sample dimensions, not metres. Raw R16 must contain exactly width × height × 2 bytes with no header. Check that the input is not a PNG or a 32-bit grid. |
| PNG is rejected | Export a true 16-bit grayscale PNG without alpha. RGB, palette and 8-bit PNG files are not accepted by the build. Interlaced PNG must be exported again without interlacing. |
| Random spikes or noisy ridges | Check raw byte order, width and sample type. Set "format": "r16be" in build.heightmap if the exporter used R16BE. Signed or floating-point samples must be converted first. |
| Terrain is too flat or too tall | Check the actual altitude range or exporter scale and offset. Do not reuse the template’s default scale for an unrelated heightmap. Correct the values in build.heightmap and build again. |
| Terrain is stretched or too large | Check the spacing and the (samples − 1) × spacing formula. The source format uses one spacing for both axes. |
| Terrain faces the wrong direction | Check row order. Set "row_order": "south_to_north" in build.heightmap when needed; columns must run west to east. |
| My new map still looks like the starter slope | Confirm that step 4 succeeded, then rebuild and start a new session. Check that build.heightmap.file points to your original source. |
| Loading is slow or terrain looks coarse | The build chooses an initial mesh stride to limit loading work. Override it with "sample_step": 1 inside build.heightmap for every sample, or 2 for every second sample. Increasing it reduces detail and collision resolution; lowering it adds work. Test each change. |
| Trees float above the ground | Update the Custom Maps loader to 1.11.1 or later with skieomod update while the game is closed, then start a new session. Tree roots now follow the rendered triangles at any sample_step. |
| Forest stops at a square boundary on a rectangular map | Check that you installed the latest built package, whose forest uses the full heightmap extent. An old forest file or old map installation may still describe the previous square. The biome intentionally leaves steep or high terrain bare. |
| Tree generation exceeds the candidate limit | Reduce density_per_hectare or split the map. The bake permits at most 2,000,000 candidates and 1,000,000 trees; habitat filtering may produce fewer trees than the nominal density. |
| Forest importer is missing | Update both the CLI and loader to 1.11 or later and rebuild. The loader now reads SKXY only; JSON forests must pass through the build. |
| The map is absent from the game | Close the game, check skieomod config, run skieomod update, then skieomod run my-resort. Make sure you launch the same game/demo installation that setup configured. |
The build accepts up to 32 MiB of raw samples and 16,384 samples per axis. For larger inputs, resample in your terrain tool first. World extent is not capped at 8 km; choose spacing and rendering detail to suit the size of your map.
Where to go next
Your project’s docs/terrain.md, docs/vegetation.md and docs/scripting.md explain the terrain format, tree positions and Lua API. The terrain guide describes template defaults; the calculated terrain values written by your build describe your own map.
Project reference: getting started, CLI documentation and map format specification. The versioned guide bundled with your installed tools contains the matching release documentation.